 Imagine a teaching model that you can apply for almost any circumstance, whether it’s a ten-minute address, a two-hour lecture, or a fifty-minute discussion. Envision a methodology that you can use to design a lesson plan for any number of students, whether it’s three, thirty-three, or even three-hundred, and one that can be applied across any discipline.
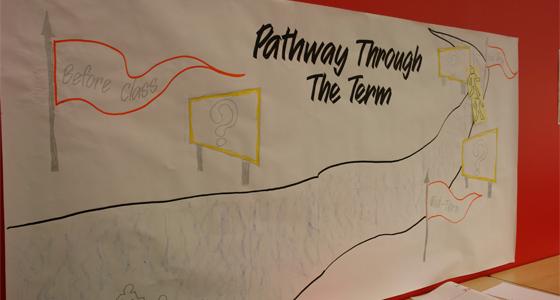
In the CTLT Summer Institute Session, If You Don’t Know Where You’re Going… Planning Effective Instruction, Jim Sibley and Amanda Bradley drew significant interest from instructors across UBC, who came to learn about effective course design and practice the Set-Body-Close methodology. In a show of interest in the session, instructors from more than fifteen different disciplines were in attendance, and extra chairs were needed to make room for the full turnout of eager participants.
Jim is Director of the Centre for Instructional Support at the Faculty of Applied Science, and Amanda is a Senior Instructor in the Pathology and Laboratory Medicine Department in the Faculty of Medicine. As the speakers introduced themselves, they made a point to relate to the audience by recalling their early years of teaching. In fact, participants would soon be able to learn the exact tools that helped Amanda and Jim when they started. They would learn about lesson planning using the dynamic Set-Body-Close teaching method, and they would be able to practice their own lesson design using the tool within the two-hour session.
Of course, this workshop on effective course design was sure to be well designed. After establishing a positive mood and motivation for the session, the facilitators engaged the audience right away with a collaborative activity, to find out about participants’ existing knowledge base, and to activate it. To do so, they invited participants to brainstorm in small teams: what are the do’s and don’ts of planning for effective teaching? It was a topic that participants were clearly very eager to discuss, with a lively dialogue ensuing. After a few moments, Amanda asked the participants to share as a class. Some of the things instructors noted were that they should have a roadmap, and that they should understand the context of the class, but that they should avoid transmitting too much content, despite the temptation to share more. By starting with this activity, Jim and Amanda had a good understanding of the participants’ experience with and thoughts about teaching, and they had a better idea of where they could take the session.
 Next, Jim discussed the three specific learning objectives for the session. First, participants would learn to apply backwards course design to plan a course experience, centered around the learning objective. Then, they would learn how to write a learning objective, using the ABCD model, and finally, participants would learn how to design a lesson that teaches the learning objective, using the highly versatile Set-Body-Close teaching model.
Jim introduced the concept of backwards course design as one of the most important principles of planning for effective teaching. He explained, “I need to know where I want to get the learners to, the destination, and then my instruction leads their journey to that destination.” Often, the triad between learning objectives, teaching activities, and assessment takes a different course: an instructor will plan teaching and learning activities first, with a focus on the content they want to teach. Instead, backwards course design asks the instructor to focus on goals and objectives first, and then to decide on the assessment system, and to allow those decisions to guide teaching and learning activities. With this approach, the entire instructional design is guided by learner-centered outcomes. As an example, Jim discussed his experience planning today’s workshop with Amanda. He admitted that he had the tendency to start planning activities, and that Amanda had to “pull him back”, to finish the objectives before designing the activities. Despite these tendencies, he has learned “creating objectives first helps you do things assignment-wise and learning-wise that are always in the right direction. It informs you, on what you are trying to do, and it also informs students, about what they are trying to do.”
With that, Jim then segued into the second goal of the session, to enable participants to create strong learning objectives for their courses. He presented the ABCD (Audience-Behaviour-Condition-Degree) approach as one model to create objectives, but says there are many alternative models that are helpful. Regardless of the model that is ultimately chosen, the key to creating good objectives is finding ways to make outcomes that are both observable and measurable. And, while affective and emotional objectives can be particularly difficult to measure, Jim advises that it is still possible to try. He discouraged the instructors from building their objectives alone – a piece of advice that he still follows himself. “Get some feedback”, he says. “Show them to your colleagues, to your TA.” To engage the audience once more, Jim led an interactive activity which allowed the instructors in the room to apply their learning right away.
 A large part of the workshop focused on the third goal, which was to teach participants how to effectively design a session that would lead students to the course learning objectives. In this portion, Amanda introduced the Set-Body-Close planning method, and instructors had the opportunity to apply their learning to an example session.
Amanda began by discussing Set-Body-Close as a model that is popular among many instructors, because it can be applied to almost any teaching and learning occasion. The model can even accommodate Amanda’s diverse teaching needs, which range from a class of 340 students in first year Medical and Dental School, (Principles of Human Biology) to her intimate learning courses in the Bachelor of Med Lab Science Program (Pathology 405 and 415), which enrolls anywhere from eight to twenty-four students.
Set is the beginning of the lesson, where the instructor establishes the MMUCKO: Mood, Motivation, Utility, Content, Knowledge base, and Objectives. Here, the instructor sets the stage for the session ahead. To address Mood, Amanda inquired, “what are some things you do to set a positive tone at the beginning of a class?” Participants talked about appearing calm, arriving on time, and being prepared, and someone suggested that sharing a joke with learners could create a positive atmosphere. After a positive mood is ebbing, the instructor would move on to establish the Motivation and Utility for the lesson. The utility statement communicates how the material is going to be useful for learners going forward, essentially a practical explanation. The motivation statement is a bit deeper, involving an emotional element for learners. To achieve the motivational element, Amanda tries to tie her content to something the students really care about. She used the example of her first year Medicine classes, where her students are focused on becoming physicians. To appeal to these interests, Amanda helps students to care about what they will learn by telling them a brief story about a patient. Of course, understanding the students is a pre-requisite for crafting a good motivational appeal. She adds, “it’s important to know who your students are, and what they care about. Or, you can at least make an educated guess.” Following the motivational tie-in, the instructor should outline the Content for the session, and test the students’ Knowledge base. This has a dual purpose: for the instructor, it serves as a gauge to anticipate the students’ level, and it also serves a warm-up purpose for students, preparing them for new concepts by activating their existing knowledge base. The instructor would then finish the Set by laying out the Objectives for the lesson. In total, Amanda says she might portion approximately five minutes on the Set during a fifty-minute lecture.
 After she uses the Set component to enhance interest in her lessons, Amanda carries on to the Body phase of the lesson-planning model. In the Body stage, the instructor engages students with the materials that will guide students to the stated learning objectives. This section is guided by the principle that less is more, which can be a struggle for any educator who is passionate about the depth of her discipline. To manage the amount of content, Amanda suggested distinguishing between “need to know” and “nice to know” material. She also highlighted that it is important to involve the learners throughout the lesson as much as possible. This can be facilitated through a lesson planning worksheet that emphasizes student activities as separate from the teacher’s activities, through an additional column. This approach makes it very clear whether the students have sufficient involvement in the lesson. In addition, instructors should vary the stimuli throughout the lesson. Questions, varied intervals of silence, and audio-visual aids are only a few of the possibilities that can provoke engagement.
The third and final stage is the Closure of the lesson. During this stage, the instructor should SRAN: they should Summarize the session, Relate the lesson to the Set stage, and give a sense of Achievement, while remembering to provide No new information. It is an opportunity to allow students to leave with a sense of achievement, with new learning and an appreciation for how their learning connects to a bigger motivational factor. It is important not to provide new material, as it could threaten students’ sense of achievement from the lesson. This can often arise during the question and answer period, as some students ask questions that would require new material to provide answers. One way to get around introducing new material in the closure is to invite student questions just before the closure. This way even if a question is “beyond the scope of the lesson” (and instructors may or may not choose to defer the question), the closure will allow for all students to leave with a clear idea of the main learning outcomes. To relate the concept to a common household activity, the Closure plays the role that a saran wrap would after preparing a well-made sandwich.
Before the session came to an end, participants were able to practice the Set-Body-Close model and the new skills they learned, as Amanda and Jim asked them to work together to organize lessons about topics outside their typical disciplines. By the end of the session, participants had designed some interesting lessons about bike safety and others about identifying counterfeit currency, demonstrating that their competence in lesson design could be applied to almost any subject area.
To wrap up this session, Jim and Amanda provided a great example of how to facilitate Closure. They related the new learning model back to the Set, and discussed how the model would contribute to participants’ work as instructors. With that context, the facilitators imparted a sense of achievement about what we can all do with the tool, and its potential to improve students’ learning in the classroom.
Missed this session? You can find much of the workshop content in the Guide to Teaching for New Faculty at UBC, which is available as a print edition through CTLT, or online here.
Instructors are also encouraged to explore CTLT’s Course Design Intensive workshops for further development in course design. These workshops are offered as part of a series throughout the year.

[…] learn about effective course design and practice the Set-Body-Close methodology. Read the original: Designing Effective … – Centre for Teaching, Learning and Technology Posted in Uncategorized Tags: accessibility, back-or-forward, barber-learning, british, […]
[…] students to follow the logic of the contents. The simplest way to structure a lesson is to use the Set-Body-Close model. During the Set, the teacher opens the lecture and “Tells them what she will be teaching […]